About Roofresh

My name is Kelsey, not Roofresh, but Roo IS my nickname. I live in the Phoenix area with my husband and we are having fun being newlyweds and going on crazy adventures together. We like finding new hangouts, food, art, music and friends; so that's pretty much what my blog is about. You'll find a bit of fashion, design, nutrition and family sprinkled throughout my content, or anything else that catches my eye at the moment. My blog has changed a lot over the last year, but you'll see that it's really just a record of our lives together; our public journal.

Saturday, September 10, 2011

3-4-1 Hair Tutorial

I've been having a little more fun with my hair lately, with it getting a bit longer I can do more! I was going to do some tutorials to show you what I've been doing, but there's already some great one's out there! Below you'll find pictures of a few hairstyles I have tried lately and links to the tutorials for them. Enjoy!

Topknot Tutorial:
My look
How to get it


The Bun from Sydney Poulton on Vimeo.

Fishtail Braid
My look
How to get it

The Chignon
My look


How to get it (is actually an old tutorial that I did, click on the photo for the link.)


Hope this gave you some inspiration and know-how! Happy weekend!

Keep it real,
Roo

Labels: , , , , , ,

Thursday, February 17, 2011

My Non-Do, Hair-Do

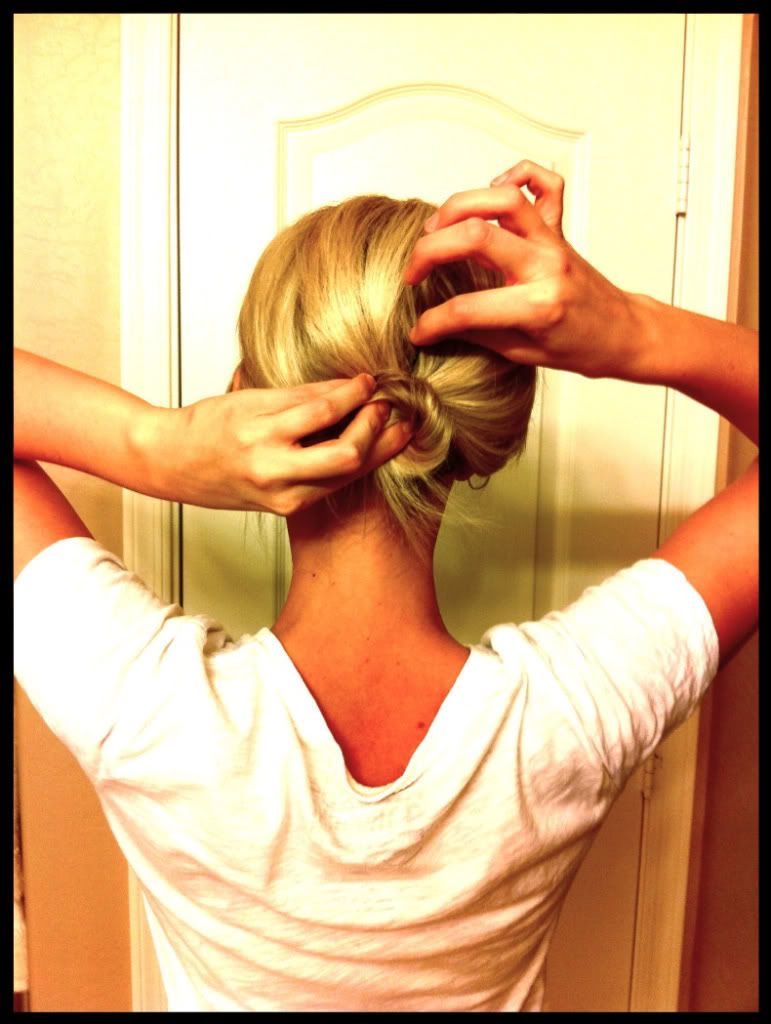
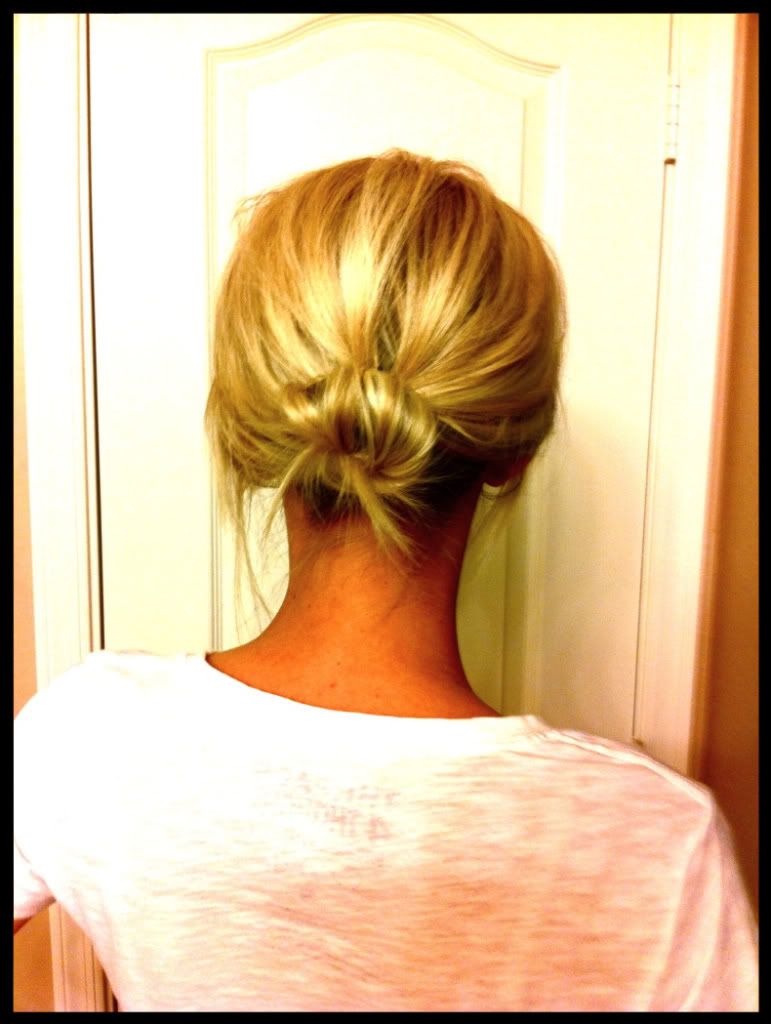
Lately I've been a fan of my non-do hair-do.  Yes, I made that up. I call it that because I'm not sure if this is how you're supposed to do a chignon, but it's my version and it's QUICK! It's great for days that I can't get a hair wash in (or choose not to) and my hair is a little more...we'll say 'textured'.  I start by lightly brushing my hair out or just running my fingers through it if it's not too bad in the morning. If it seems to be a little too silky-smooth still I'll tease my roots a little or sprits some hairspray in it to add that extra texture. 
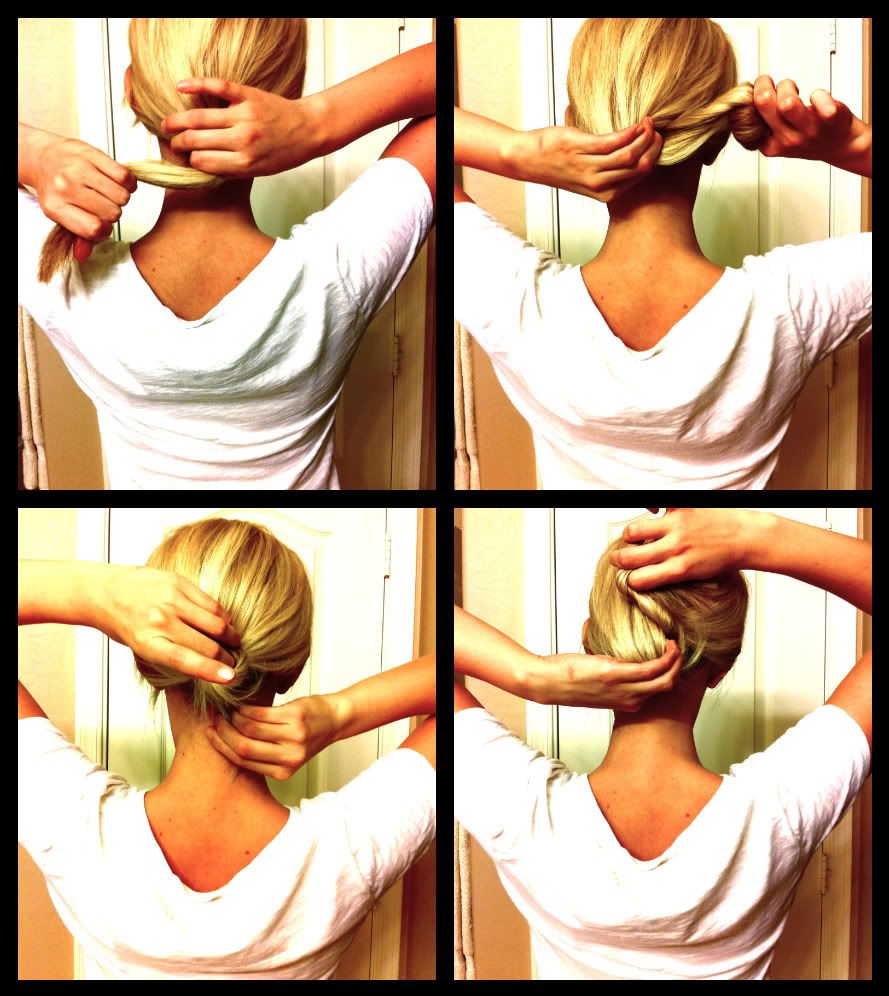
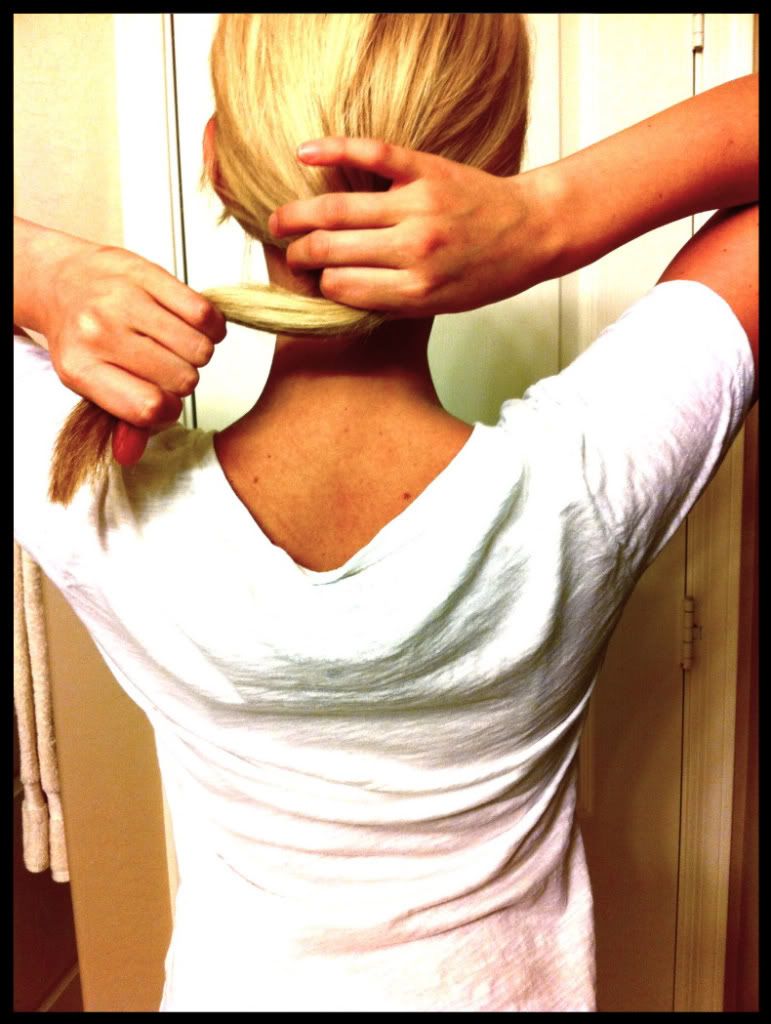
{Step one} Gather all of your hair in one hand
{Step two} Start twisting all of your hair in your hand around 1-2 fingers (index and middle) depending on how thick your hair is...mine is not very thick so I only use one finger. :) Hold your starting point in your other hand as if it were a hair tie (if you have hair that is thick and slippery you may just want to put a hair tie in.
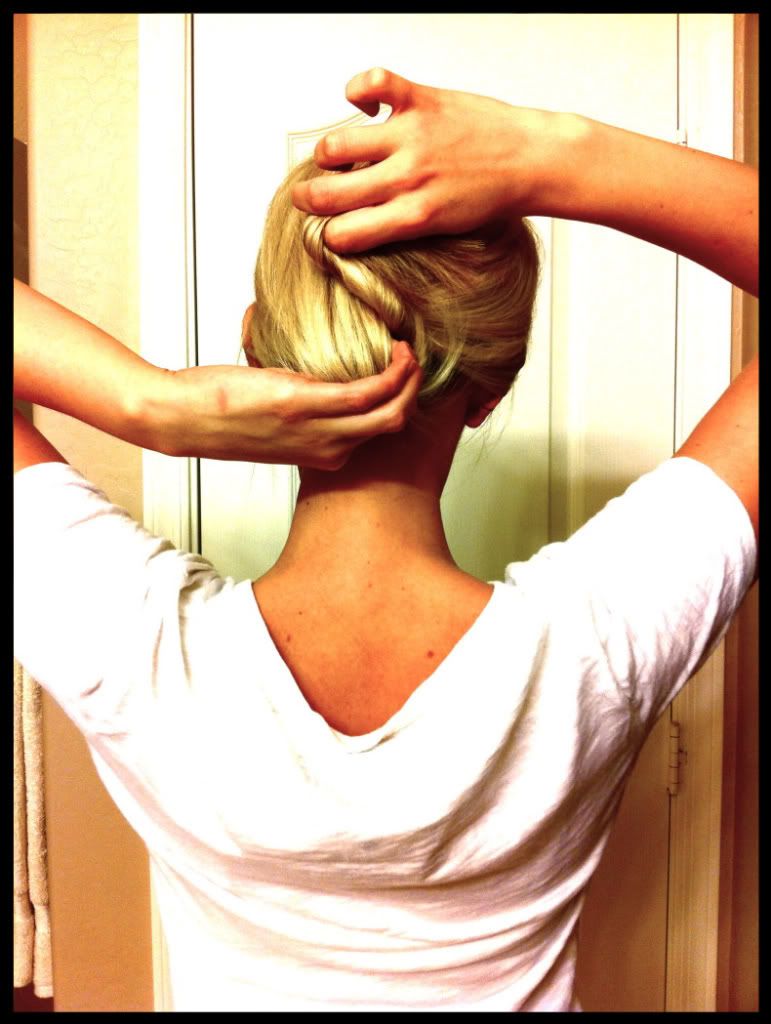
{Step three} Continue to wrap your twisted pony around your starting point until you reach the end of the pony, continually twisting your finger at the same time to keep the ponytail tight.
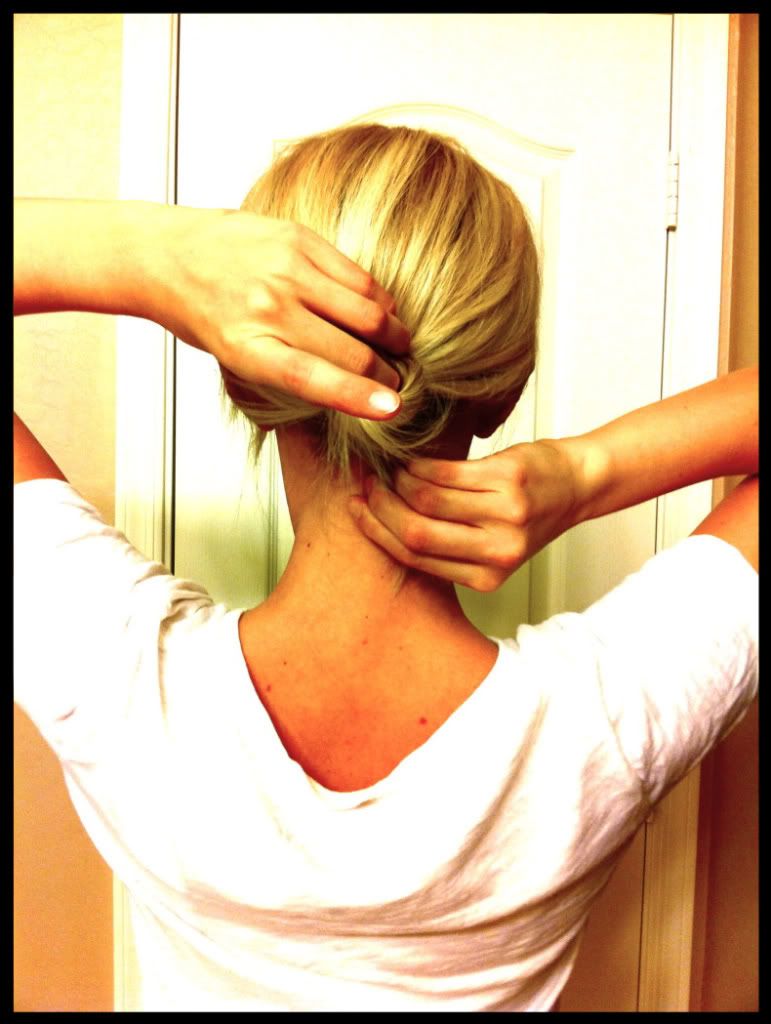
{Step four} Secure the end of your pony with a bobby pin, making sure that it goes as far in towards the center of the bun as possible.
{Step five} Add extra bobby pins to ensure that the bun will stay in place. I usually use about 3-4, if you have thicker hair or many layers, you may have to use more.
{Step six} Toussle your hair slightly to give it a 'messy, effortless' look and sprits it a few more times with some hairspray or styling product if needed.
Ta Da!
There you have it, your easy 'I'm going shopping and look great doing it' look. I hope that this was more helpful than confusing, if not...well maybe hair tutorials just aren't for me then! If you tell me that you liked it, I might start including more tutorials on the blog. ;)

Labels: , , ,

Saturday, November 20, 2010

Hair History

So again you might have noticed that I changed a lot on my blog. I've been annoyed lately because every time I would look at my page it has looked so cluttered! Ahhhh, I feel much better now, but I'm still looking for things to nix in order to clean up. :) Anyway, while looking through old pictures on my computer to change my look, I was reminded of all of the times I changed my hair color-I guess my blog was not the only thing I got antsy with! I thought that it was a little comical so I decided to share some of the transition pictures from brunette to blonde. 


Enjoy. 


{Photo taken by Erica Perkins}

This was when I was really dark, almost black-you can barely see my hair! 

{Asher and me}

I figured that my hair was looking too dark, plus I had to dye my roots every few weeks to cover up my blonde the was growing in so I added some highlights...

{My Easter baskets-yes two-from Jim one year}

{San Diego when we got engaged}

So after Jim and I got engaged, it went into hyper drive to switch from odd, in between hair color to blonde for engagement and wedding pictures.
{Having a little too much fun at JB's birthday}

{Us at Disneyland. If you haven't noticed, I really like making that face}

{Out and about at Santarchy last year}

{Graduation, December 2009}

{New Year's Eve last year}

{Our engagement shoot}

{Wedding, May 2, 2010}

So as you can see I've made a lot of changes over the last 2 years, not just the hair either! Engaged, graduated and married! I hope you enjoyed my little transformation of hair history, as well as the transforming of my blog. 

Roo

Labels: , , , , , ,

Tuesday, November 16, 2010

I did my Haaaair Today

So today I took a little lesson from Busy Bee Lauren on how to do my "haaaair" using a 1" flatiron; this gives you a tousled "beach" look that I love! 

Here are my results...


In all honesty, I could use some practice and that flower is pretty much swallowing my head-but I love it!

In case you are looking for an over sized flower, the etsy store I bought it from has no listings at this time, but maybe I'll do a little tutorial over the Thanksgiving holiday on how to make your own...if DIY isn't your thing, Lauren has a wonderful shoppe with the cutest headbands and hair accessories EVER!

Keep it real,

Roo

Labels: , , ,